Ody
Helpful Player

Posts : 94
Experience Points : 104
Reputation : 7
Join date : 2020-05-02
 | Subject: ARMORY APPEARANCE  Fri May 29, 2020 11:00 pm Fri May 29, 2020 11:00 pm | |
| ARMORY While we are still waiting for XP Craft to go live on the server, the best way to customize your own armor appearance is still via toolset. If you download DB Armor you can place it inside Documents/Neverwinter Nights 2/modules folder which skips the Haks import step. You can then simply open the module and work on your armor. This module will self update with server updates. I updated this guide with some Quality of Life. This guide has been originally written and created by Nexuzium. - Haks import:
We'll start out by importing all the .HAKs for Dalelands Beyond, so we have all the creature models, armor models and so forth in our module. When in View > Module Properties (see picture 2), and you add all db haks, you can type db.TLK inside Custom TLK file box, and then save. This will add additional appearance options in armor setup along with imported HAK files, for example female and male armors that you can see on Celestial Shapechange spell. Click on View, then Module Properties. 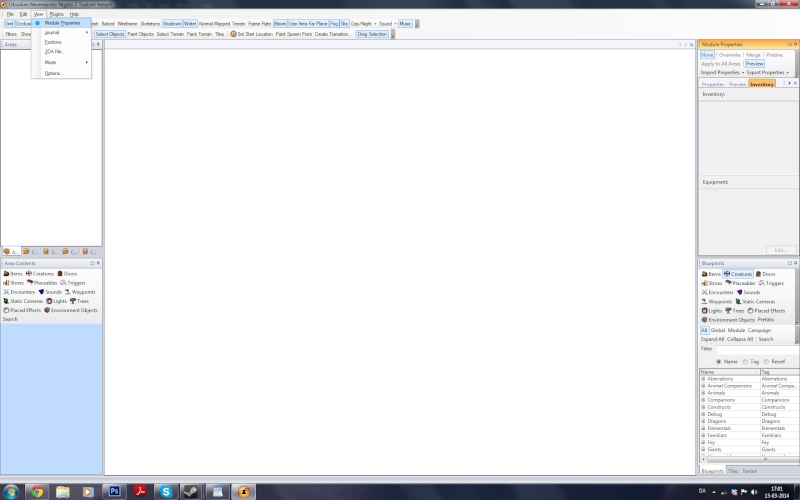 Or click on Properties like this. 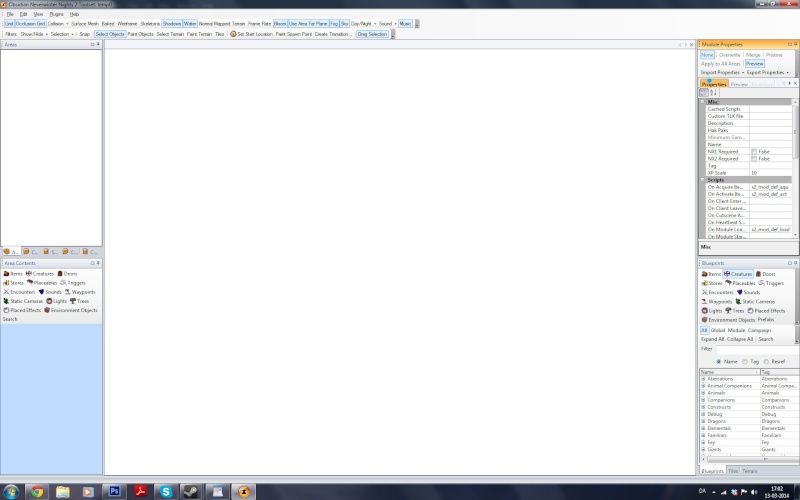 Under the Properties, you'll find a section called Misc, and under it you'll find the Hak Paks. Click at the right side of the table, as shown on the image, and then on the [...] button.  This opens up a window for the Collection of our HAKs. Click on Add.  This creates a slot for our HAK to be imported into. In the right side of the image, click on table, then on the button.  It will open up a window where you can find all of your HAKs. They're automatically saved under Documents/Neverwinter Nights 2/hak. Click on the first HAK, then select open.  The value of our first slot should now be the HAK we selected. Click on add to create a second slot. 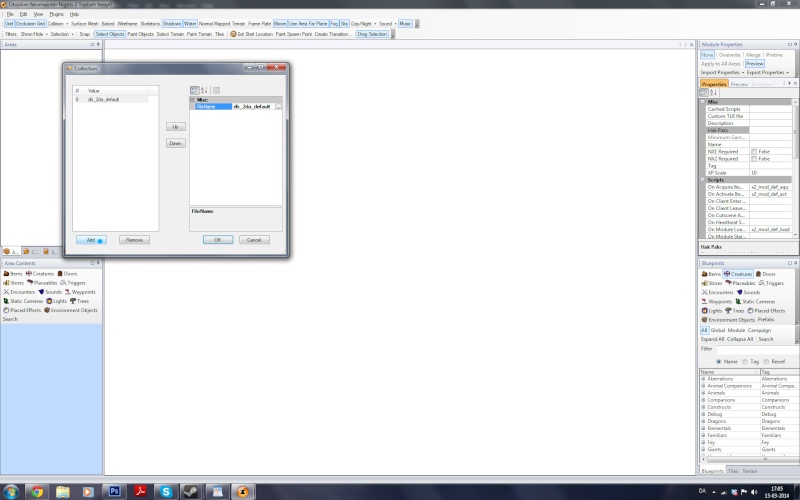 Just like before, click on the table of the right side of the window, then click on the button.  Select the second HAK, then open. 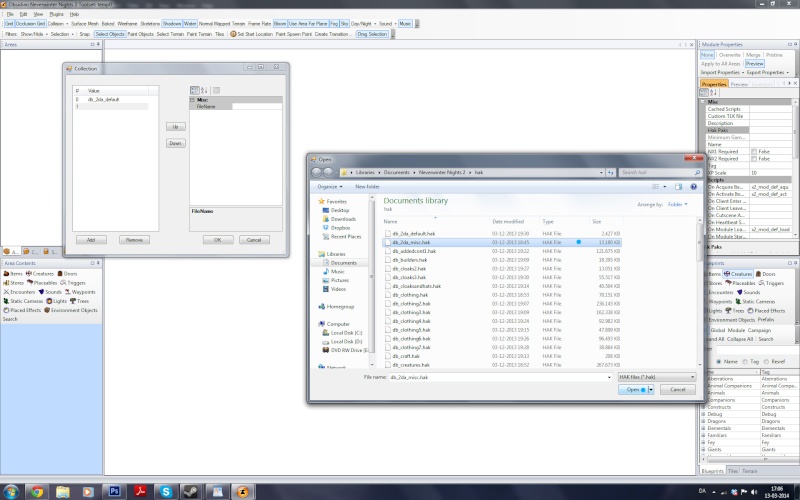 Continue this process til you've imported all of your Dalelands Beyond HAKs. They're named "db_something". I also had 6 extras, and I've imported then as well just to be sure that nothing's missing
- Saving:
Once all the .HAKs have been imported into the module, I suggest you save your module as HAKs_Saved, or some other relevant name. This step is merely so you don't have to import 56 HAKs every time you want to make a new set of armor, for instance for a different toon, and in case it crashes. You could save all the armors together, but if you have 10 characters, you'll have a lot of items to keep track of, so I suggest saving the .HAK module as something different every time you make a new armor, for instance Bob_Builder, Thomas_Test ect. Click on File, Save as... When you save it, you'll get a warning that the module doesn't have a valid start location and therefore won't work when run in the game. This doesn't matter, as we're not creating a PW, but merely .ERFs for the PW. Smile Just click Yes. 
- New Item:
Did you remember to make a new save for this character's armors? Under Blueprints, find Items.  In this example, we're making an armor, so please click on armor. 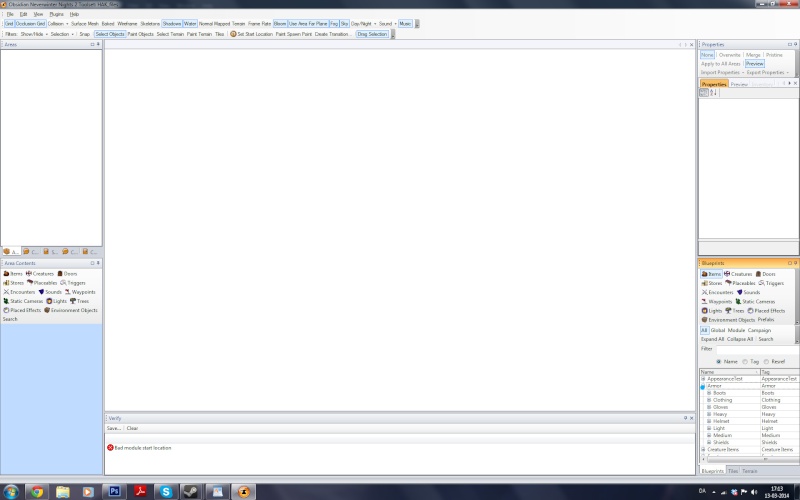 Then open heavy armor.  Find a random heavy armor that's premade and select it.  Right click on the armor, select Copy Blueprint, then select Module. 
- Setting up the window:
We won't have too good an overview, as the properties window is tiny. We're going to pull it out in the middle of it all and enlarge it. The window where we opened the Collection window for our HAKs is most likely named after our selected item now, but no matter what the name is, it is in the same spot as before, though the content might've changed. If you're uncertain if it's the right window, go up under View and select Module Properties again. 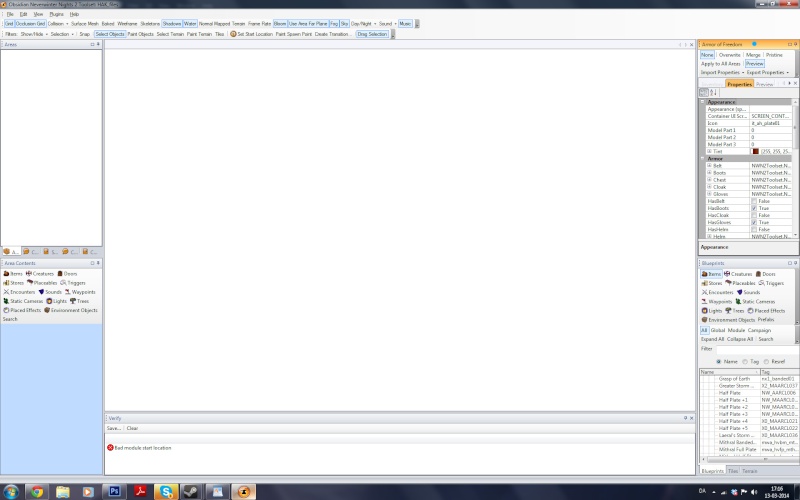 Drag the window out in the open like this. Enlarge it by pulling the edges or corners out.  You should get a window much like this, which'll give us a much larger overview. 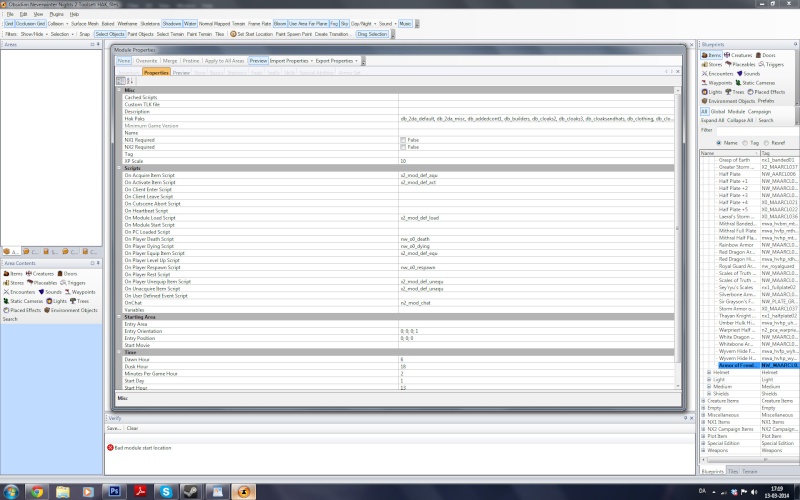
- Item Properties:
Here we're going to adjust the properties of our item. Under Blueprints, find the armor we made (cloned) in the bottom of the section. Please note that its name is written in bold. When we click on the item, we'll see its properties  Icon will let us choose a pretty icon for the armor. This is a little bonus gadget some might like.  Next we're going to adress the basics of the classifications. Arcanum has stated that he wants Localized Name, Resource Name, Tag, and Template Resref to be named after the character and item type. Just click on the table to change the content.  In this example, we're going with the character Bob Builder. This item is an Armor, so the four classifications will be Bob Builder Armor. If this was a cloak, we'd name it Bob Builder Cloak.  Please note that for guild items, you write the guild name instead of character name. For instance Ironhouse Boots, Zhentarim Ring, Ahk'Velahr Cloak. 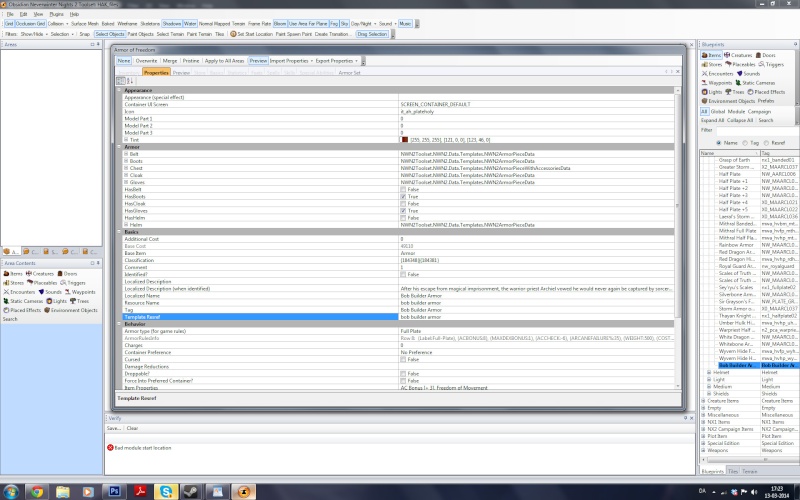 Under the Behavior, we'll be able to pick the item type. In this case we go with Mithral Full Plate, instead of regular Full Plate. We could also have picked Mithral Scale Mail, or Adamantine Chain Shirt, ect. Just click on the table, then the menu button, select the correct type.  The item you copied might have enchants which your IG armor doesn't have, or maybe your armor has enchants the clone doesn't have yet. We change that under Item Properties.  This armor isn't supposed to have Freedom of Movement, so we'll select that, and then click on Remove Property. 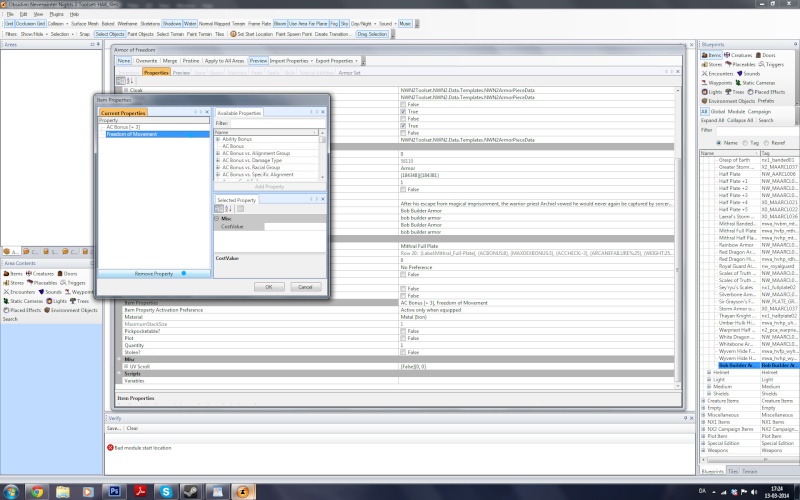 My armor's supposed to have +3 AC, which it had already, lucky me. My IG armor also has Damage Resistance Cold 10/-, so let's add that. First we open up the drop down Damage Resistance options.  We scroll down til we find the Cold attribute. Click on Add Property.  The Cold attribute is automatically set to 5/-. We need to change that to 10/-, so we click on the attribute. 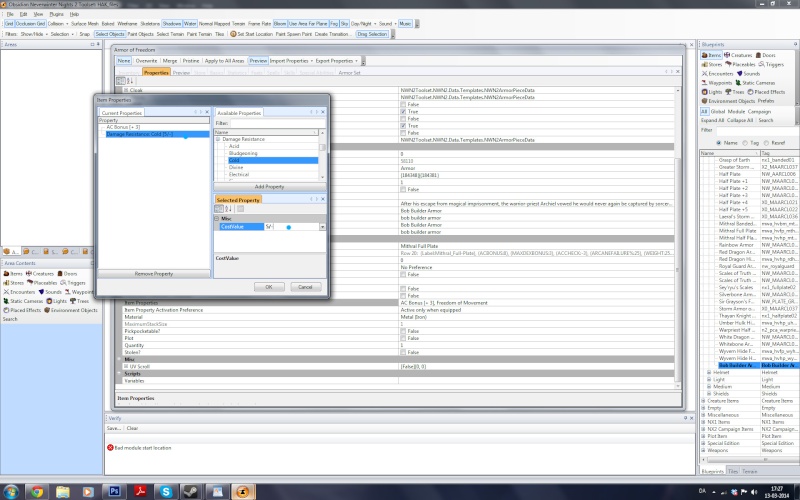 We click on the drop down menu, find 10/-, and voila. Click ok when you've finished the Item Properties. 
- Armor Setup:
We're going to set up the Armor Set view for our needs. Click on Armor Set like I do in the image. It might take a moment to load, but you should get something like this in the end. 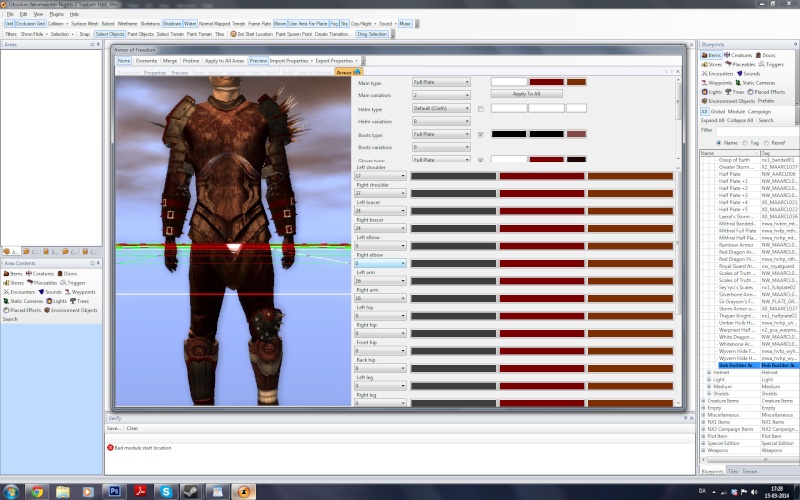 Let's remove some of the annoying effects, so we only see the character. Remove Grid, Occlusion Grid, Use Area Far Plane, Sky. You might also want to remove/add Bloom to see the armor with and without light effects.  Let's rotate the view a bit... Scrolling in and out on the mouse will zoom in and out. Pressing scroll and moving the mouse will pan the view. CTRL + pressing scroll and moving the mouse will rotate the view. 
- Armor Types:
A hint: if you want an easy way to see how the armor will look as a set, you can add gloves, boots, ect. to the armor, just remember to untick them before exporting the .ERF(s). You should make each piece seperate of the others. Clone a glove item for your gloves. Clone a helm for your mask. Something a bit more tricky, which I won't cover this time, is adding the individual items to a creature that looks like your own and equip the items, so they can be previewed. Under Main type, you will find all the types of armors you can use. Some aren't allowed for females at the moment, so please keep that in mind. I'm picking Scale Mail for this one.  Under Main variation, you'll find the armors under the type you picked. Scale Mail only has two options. Clothing for instance has a lot more, but we're making a heavy armor in this example.  Since this is an armor, I'm going to remove the boots and gloves on it. This is done by unticking the box next to it. 
- Details, Colors and Extras:
Let's pick a color for the main armor. Just click on one of the three boxes to pick a color. Please note that one of them might be skin color.  You can click on one of the colors to the right like I did, or you can write in a hex number for the color, or you can use the hue slider along with the saturation/intensity field.  When you've found some colors you're satisfied with, you might want to click Apply To All, so all the extra parts of the armor get the same color, or you can do it all manually. As seen in the image, you might not actually see this change applied; note the shoulder pads for instance are still red and not blue. 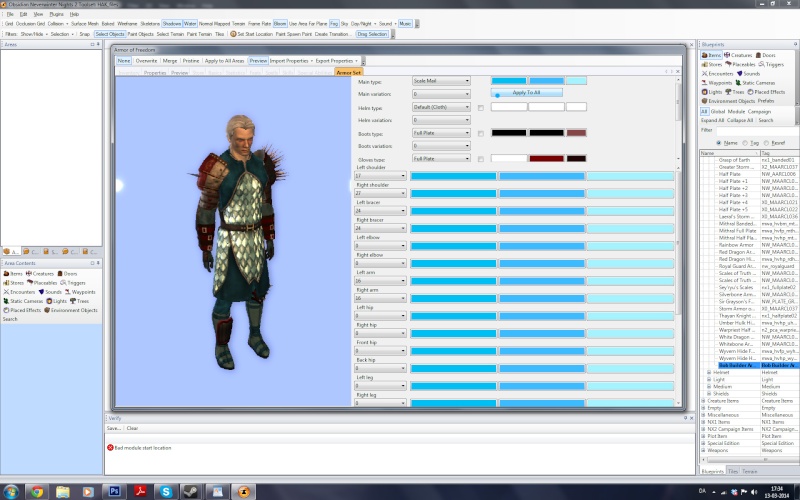 As I click to assign a new shoulder pad, it fixes the color bug in the window. It might also be fixed by changing the view, as it updates the window. There are different categories from shoulder to arm to knee. 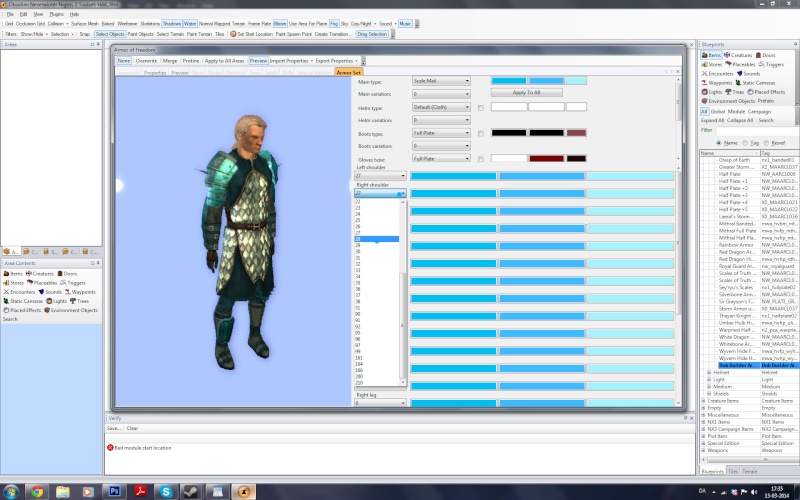 Here I've changed the extra parts to what I liked, but the colors don't really match the armor. I find the scales a bit too cyan compared to the more pale scales on the armor.  I've made some edges more brown on the spareparts to fit the mild brown edge on the armor. I've lightened the scales to bit the armor. I've made some parts more dark cyan to fit the armor. Please note that some of my dark cyans are actually different shades of dark blues, as the parts of the armor don't all react the same to the colors picked, so you might need to do fine tuning.  This is the armor from behind. I removed bloom and added it again to compare the colors with and without shine effect. 
- Export ERFs:
The armor's done. We might want to make more than just an armor though, so feel free to duplicate a helmet for instance and just repeat the steps for the armor. When you have made all the items you want, the only thing left is to export it as an ERF Click on File, then Export...  Under Type, find ItemBlueprints, since we're making items.  All the items you've 'made' in your module will be available to add. Click on an item, then on Add. 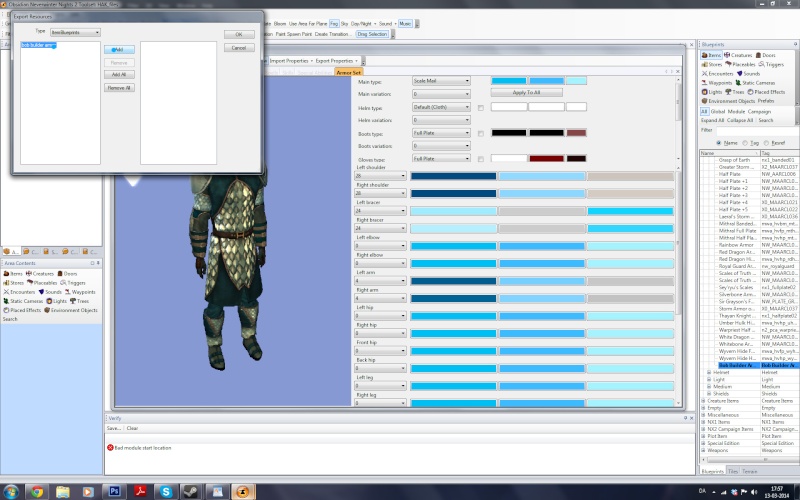 Once all the items you want for your character have been added, just clock OK.  Give the .erf an appropriate name, character name for characters, guild name for guilds. 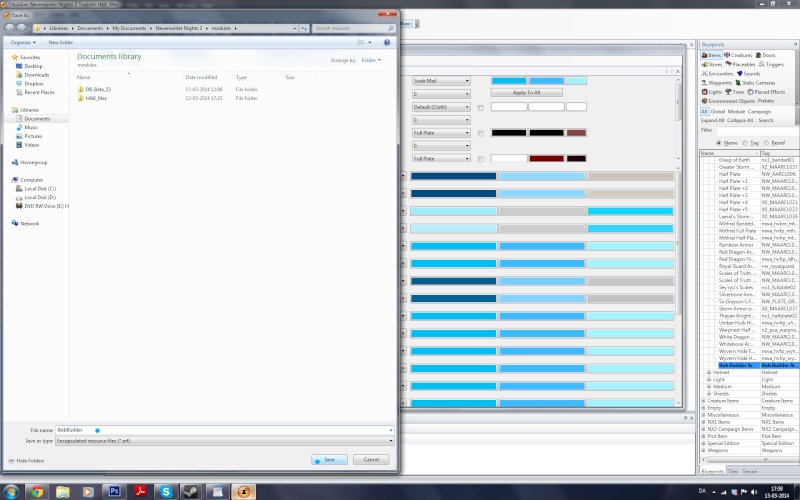
|
|